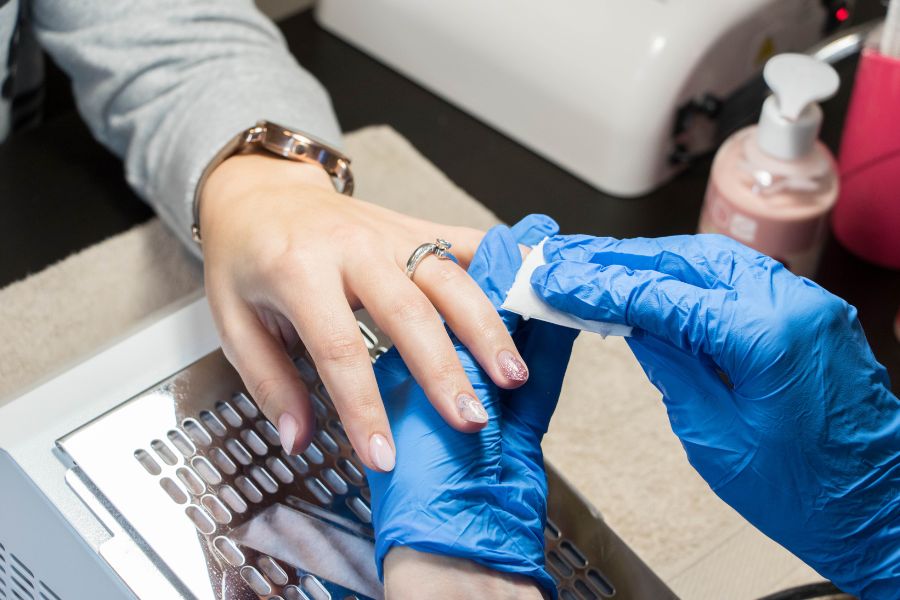
Everything You Need to Know About Builder Gel Nails

What Is Builder Gel?

Builder gel differs significantly from a standard base coat in purpose. Base coats are thin, preparing nails for polish adhesion and colour. Builder gel adds substantial structure, reinforcing weak or brittle nails. It’s thicker and more versatile, often used for overlays or extensions. Some hybrid products combine both, but pure builder gel excels in strength, especially when clients want French tip nails longer and more durable.

  • Hard Gel: Provides rigid support for extensions.
  • Soft Gel: Offers flexibility and easier removal.
  • Finish: Delivers a glossy, natural look.
  • Versatility: Customizable for various shapes and lengths.

How Does Builder Gel Work?

Builder gel chemically bonds to the nail’s surface for strong adhesion. It hardens under UV or LED light in 30-60 seconds per layer. Applied in thin coats, it self-levels to form a smooth apex. Multiple layers are used to build the desired thickness and strength for builder gel nails. Proper application ensures no lifting, cracking, or peeling over time.

  • Curing: Solidifies gel to resist chipping.
  • Layering: Thin coats for even strength.
  • Protection: Shields natural nails from damage.
  • Maintenance: Requires regular infills for upkeep.

Is Builder Gel the Same as Base Coat?

Builder gel differs significantly from a standard base coat in purpose. Base coats are thin, preparing nails for polish adhesion and colour. Builder gel adds substantial structure, reinforcing weak or brittle nails. It’s thicker and more versatile, often used for overlays or extensions. Some hybrid products combine both, but pure builder gel excels in strength.

  • Base Coat: A thin layer for enhanced polish grip and durability.
  • Builder Gel: Thick, structural enhancement.
  • Dual Role: Can act as a base with added benefits.
  • Strength: Ideal for weak or damaged nails.

Builder Gel vs. Other Nail Options

Builder gel nails offer a unique blend of flexibility and durability. They stand out among acrylics, dip powder, and other enhancements. Comparing these options helps you choose the best fit for your lifestyle. Each method has distinct advantages and considerations. Builder gel is perfect for those prioritizing a natural feel with lasting strength.

  • Flexibility: Adapts to natural nail movement.
  • Durability: Resists chips and cracks for weeks.
  • Customization: Shapes and lengths are highly adjustable.
  • Natural Look: Blends seamlessly with natural nails.

Builder Gel vs. Acrylic Nails

Builder gel cures under light, offering a lightweight, odourless application. Acrylics rely on a liquid-powder mix that air-dries, creating a harder finish. Builder gel is easier to shape and less damaging to remove. Acrylics excel for long, dramatic extensions but feel heavier. Builder gel nails suit those seeking a natural, flexible enhancement.

  • Application: Builder gel is odour-free and smooth.
  • Removal: Soaks off faster than acrylics.
  • Comfort: Feels lighter and more natural.
  • Durability: Acrylics are more resistant to heavy impacts.

Builder Gel vs. Dip Powder

Builder gel provides a glossy, buildable finish for nail reinforcement. Dip powder involves applying coloured powder layers without the use of curing lights. It’s faster for at-home use but less flexible than builder gel. Builder gel nails excel at strengthening thin or weak nails. Both options last 3-4 weeks with proper care.

  • Speed: Dip powder applies quicker at home.
  • Flexibility: Builder gel bends without cracking.
  • Finish: Builder gel offers smoother, glossier shine.
  • Strength: Superior for thin nail reinforcement.

Builder Gel vs. Gel Extensions

Builder gel builds strength directly on natural nails for overlays. Gel extensions use pre-formed tips or forms to add significant length. Builder gel is ideal for subtle enhancements without bulk. Gel extensions suit those wanting instant, dramatic length. Both cure under light for lasting durability.

  • Customization: Builder gel shapes naturally.
  • Thickness: Extensions can feel bulkier.
  • Maintenance: Builder gel requires fewer fills.
  • Natural Look: Blends seamlessly with nails.

Builder Gel vs. Regular Gel Manicures

Builder gel is thicker and stronger than regular gel polish. It reinforces nails, while gel polish focuses on colour and shine. Builder gel nails resist chipping for weeks, outlasting regular manicures. Regular gel is quicker to apply but less durable. Builder gel promotes nail growth and protection.

  • Strength: Reinforces weak or brittle nails.
  • Finish: Both provide high-gloss shine.
  • Duration: Builder gel significantly extends wear time.
  • Versatility: Allows for slight extensions or overlays.

How to Use Builder Gel

Applying builder gel demands precision, quality tools, and practice. Start with clean, prepped nails to ensure strong adhesion. Work in thin layers to avoid bubbles or uneven surfaces. With the proper technique, builder gel nails look professional and last weeks. Essential tools include a UV/LED lamp, files, and application brushes.

  • Prep: Clean and buff nails thoroughly.
  • Tools: Use high-quality brushes and lamps.
  • Layers: Apply thin, even coats for a smooth finish.
  • Curing: Ensure complete curing for each layer.

Step-by-Step Application

Builder gel application typically takes 45-60 minutes to achieve a flawless result. Following a structured process ensures durability and aesthetics. Use nail forms for extensions if desired. Seal edges carefully to prevent lifting or peeling of builder gel nails.

  1. Buff and clean nails with an alcohol wipe to remove oils.
  2. Apply a primer or dehydrator for better gel adhesion.
  3. Brush on a thin base layer of builder gel evenly.
  4. Cure under a UV/LED lamp for 60 seconds.
  5. Add a building layer, shaping the apex to enhance its strength.
  6. Cure again, repeating layers for the desired thickness.
  7. Gently file your nails to perfect the shape and achieve a smooth finish.
  8. Apply a top coat and cure for a glossy finish.
  • Prep: Removes oils for better grip.
  • Curing: 30-60 seconds per layer ensures hardness.
  • Shaping: File carefully for a smooth finish.
  • Top Coat: Seals for protection and shine.

Tips for Best Results

Apply builder gel in a clean, calm, dust-free environment. Use high-quality gel to prevent yellowing or premature lifting. Moisturise cuticles after application to maintain nail health. Consistent practice improves technique for stunning builder gel nails.

  • Environment: Avoid dust and heat during application.
  • Quality: Opt for reputable gel brands for optimal durability.
  • Curing: Test lamp strength to ensure proper curing.
  • Moisture: Apply cuticle oil daily for hydration.

Common Mistakes to Avoid

Skipping nail preparation can lead to issues such as nail lifting or peeling. Over-curing can cause the gel to become brittle, resulting in cracks. Using the wrong brush size can result in uneven application. Avoiding these errors ensures flawless builder gel nails every time.

  • Prep: Never skip buffing or cleaning nails.
  • Curing: Follow recommended curing times.
  • Brushes: Use appropriate sizes for precision.
  • Cuticles: Avoid flooding cuticles with gel.

Choosing the Right Builder Gel

Selecting the right builder gel has a significant impact on results. Consider your nail type and desired outcome when choosing. Hard gels are suitable for extensions, while soft gels are best suited for overlays. Check viscosity for ease of application and self-levelling properties.

  • Hard Gel: Best for structured extensions.
  • Soft Gel: Ideal for flexible overlays.
  • Viscosity: Medium thickness for easy shaping.
  • Brand: Opt for trusted, non-yellowing formulas.

How Long Does Builder Gel Last?

Builder gel nails typically last 3-4 weeks without chipping or lifting. Nail growth and daily activities can affect their longevity. Proper application and care can significantly extend wear time. Regular maintenance keeps builder gel nails looking fresh and polished.

  • Duration: Averages 21-28 days of wear.
  • Growth: Reapply when visible gaps appear.
  • Care: Avoid excessive exposure to water or chemicals.
  • Touch-Ups: Schedule infills every 2-3 weeks.

Does Builder Gel Damage Your Nails?

Builder gel itself doesn’t damage natural nails when applied correctly. Improper removal, such as peeling or prying, can weaken or thin the nails. Gentle acetone soaks and professional techniques minimize risks. With proper care, builder gel nails strengthen and protect nails.

  • Removal: Soak gently, avoid peeling.
  • Care: Moisturise nails after removal.
  • Breaks: Allow nails to rest periodically.
  • Application: Use professional methods to reduce damage.

Signs of Healthy Application

Healthy builder gel application leaves nails strong and undamaged. No pain or burning should occur during the curing process. Nails should feel smooth and look glossy post-application. Proper techniques prevent thinning or peeling of natural nails.

  • No Pain: Curing should be a comfortable experience.
  • Smoothness: Even layers with no bumps.
  • Gloss: Consistent, shiny finish.
  • Nail Health: No thinning or damage post-removal.

How to Remove Builder Gel

Removing builder gel starts with filing off the top glossy layer. Soak nails in acetone for 10-15 minutes using foil wraps. Gently push off softened gel with a cuticle pusher. Buff and moisturize nails afterwards to restore hydration.

  • Filing: Remove top shine to allow acetone penetration.
  • Soaking: Use foil wraps for efficient removal.
  • Scraping: Push gently to avoid nail damage.
  • Care: Apply cuticle oil to nourish nails.

Post-Removal Nail Care

After removing builder gel, nails may feel dry or sensitive. Apply nourishing cuticle oil or cream twice daily. Avoid applying new enhancements immediately to allow your nails to recover. Buff lightly to smooth any rough patches.

  • Hydration: Use oil or cream daily to keep your skin hydrated.
  • Rest: Give nails a break before reapplying.
  • Buffing: Smooth nails gently post-removal.
  • Strengthening: Use nail hardeners if needed.

Benefits of Using Builder Gel

Builder gel effectively strengthens weak or brittle nails. It promotes natural nail growth without frequent breakage. The glossy, professional finish enhances the nail’s aesthetic appeal. Builder gel nails are odourless and lightweight compared to acrylics.

  • Strength: Reinforces thin or peeling nails.
  • Longevity: Lasts up to 4 weeks with care.
  • Finish: Offers a high-gloss, salon-quality look.
  • Flexibility: Feels natural and comfortable.

Additional Aesthetic Benefits

Builder gel allows for creative nail art and designs. It supports intricate patterns, glitter, or minimalist styles. The smooth surface enhances polish adhesion for vibrant colours. It’s perfect for those seeking versatile, stylish builder gel nails.

  • Designs: Supports nail art and embellishments.
  • Colour: Enhances polish vibrancy and longevity.
  • Smoothness: Provides a flawless base for art.
  • Customisation: Adapts to any nail style.

Downsides of Builder Gel Nails

Builder gel requires exposure to UV or LED light, which may be a concern for some users. Application demands practice and can be time-consuming for beginners. Removal takes 30-45 minutes, and allergies are possible. It’s less suitable for very short or damaged nails.

  • Learning Curve: Requires skill for perfect results.
  • Equipment: Needs UV/LED lamp and tools.
  • Removal: Time-consuming soaking process.
  • Allergies: Test for sensitivity before use.

Potential Allergic Reactions

Some users may experience sensitivity to the ingredients in builder gel. Redness, itching, or swelling around nails can occur. Please test a small amount before applying it full strength to avoid potential reactions. Discontinue use if irritation persists; consult a healthcare professional for further guidance.

  • Testing: Apply to one nail at a time.
  • Symptoms: Watch for redness or itching.
  • Discontinue: Stop if irritation occurs.
  • Consult a dermatologist for advice if needed.

Who Should Use Builder Gel?

Builder gel is ideal for those with weak or brittle nails. It helps nail-biters achieve length and strength over time. Perfect for low-maintenance, durable manicures, it suits busy lifestyles. Professionals and enthusiasts value its long-lasting, polished results. Builder gel nails offer a practical solution for nail enhancement.

  • Weak Nails: Strengthens and protects effectively.
  • Nail-Biters: Encourages healthy nail growth.
  • Busy Lifestyles: Low-maintenance and durable.
  • Professionals: Reliable for daily wear and tear.

Suitable Nail Types

Builder gel works best on brittle, thin, or peeling nails. It suits normal to oily nail surfaces for strong adhesion. Ideal for short to medium-length nails needing reinforcement. It adapts to various nail conditions for optimal results.

  • Brittle Nails: Adds protective strength and durability.
  • Short Nails: Enhances natural length and shape.
  • Peeling Layers: Bonds to stabilize weak nails.
  • Standard Nails: Maintains a healthy, strong look.

When to Avoid Builder Gel

Avoid builder gel if allergic to gel components or ingredients. It’s unsuitable for severely damaged nails or fungal infections. Skip if sensitive to UV light or pregnant and concerned. Offer alternatives for those who prefer frequent style changes.

  • Allergies: Test for gel sensitivity first.
  • Infections: Avoid if you have fungal or bacterial issues.
  • Light Sensitivity: Skip if UV exposure is a concern.
  • Short-Term: Not ideal for quick style changes.

Builder Gel Maintenance Tips

Maintaining builder gel nails requires consistent daily care and attention. Apply cuticle oil to keep nails and the surrounding skin hydrated. Avoid harsh chemicals and prolonged water exposure to prevent lifting. Schedule infills every 2-3 weeks to maintain a polished look. Protect nails from excessive heat or impact.

  • Oil: Use cuticle oil daily for hydration.
  • Chemicals: Wear gloves during cleaning tasks.
  • Infill: Refresh every 2-3 weeks.
  • Protection: Avoid heat and physical stress.

How to Make Builder Gel Last Longer

File rough edges weekly to prevent catching or lifting. Avoid picking or peeling the gel to maintain integrity. Wear gloves during chores to protect builder gel nails from damage. Regular infills address nail growth and maintain appearance.

  • Filing: Smooth edges to prevent lifting.
  • Protection: Use gloves for water-based tasks.
  • Avoid Picking: Prevents premature peeling.
  • Infill: Refill gaps every 2-3 weeks.

Best Aftercare Practices

Moisturise nails and cuticles twice daily with nourishing oil. Keep nails clean and dry to avoid lifting or infections. Avoid using nails as tools to prevent cracks or chips. Regular salon visits ensure professional care for builder gel nails.

  • Moisturise: Apply cuticle oil morning and night.
  • Cleanliness: Keep nails free of dirt and oils.
  • Gentle Use: Avoid prying or scraping with nails.
  • Checkups: Schedule professional maintenance regularly.

DIY vs. Professional Maintenance

DIY maintenance saves money but requires skill and tools. Professional care ensures precision and minimizes damage risks. At-home touch-ups are ideal for minor fixes, such as filing edges. Salon visits are best for infills and complex upkeep of builder gel nails.

  • DIY: Cost-effective with practice.
  • Professional: Offers precision and expertise.
  • Touch-Ups: File edges at home as needed.
  • Salon: Ideal for infills and repairs.

Cost of Builder Gel Nails

Builder gel manicures range from £30 to £80 at salons, depending on the location and the specific salon. At-home kits cost £50-£150 for tools, gel, and lamps. A professional application ensures better results, but it also increases expenses. Infill maintenance adds £20-£50 every 2-3 weeks for builder gel nails.

  • Salon: £30-£80 per full application session.
  • DIY Kits: £50-£150 for initial investment.
  • Infill: £20-£50 for maintenance touch-ups.
  • Tools: Lamps, brushes, and files add costs.

Budgeting for Builder Gel

Plan for recurring costs, such as gel refills and tools. DIY kits are economical in the long term, but they require an upfront investment. Salon visits offer convenience, but they can accumulate over time. Whether you’re considering a local gel nail in Hornchurch service or investing in a home kit, compare options to budget effectively for builder gel nails.

  • Refills: Budget for gel and acetone.
  • Tools: Invest in quality lamps and brushes.
  • Salon: Higher cost for professional results.
  • DIY: Saves money with practice.

Conclusion

Builder gel nails provide a durable, glossy solution for nail enhancement. They strengthen weak nails, promote growth, and offer customizable designs. With proper application and care, they last up to 4 weeks. This guide equips you with the knowledge to try builder gel nails confidently. Embrace their versatility for a polished, long-lasting manicure.

  • Versatility: Suits various nail types and styles.
  • Durability: Long-lasting with proper care.
  • Beauty: Professional, glossy finish every time.
  • Care: Simple maintenance for lasting results.

Leave A Comment

Your email address will not be published. Required fields are marked *