How to Remove Gel Manicure Polish

Gel polish has become a staple in the world of manicures, offering a glossy, long-lasting finish that resists chips and wear. Unlike traditional nail polish, gel polish is cured under UV or LED light, creating a durable bond with the nail. Removing gel polish at home requires care to avoid damaging your natural nails, which can become brittle or thin if mishandled.

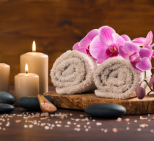
For a safer and more professional experience, many clients prefer visiting salons that specialize in gel nails Hornchurch, where trained technicians can apply and remove gel polish with precision, ensuring your nails stay strong and healthy.

What You’ll Need to Remove Gel Nail Polish 

To remove gel polish safely, gathering the right tools is essential for effective and damage-free results. Having a complete set of supplies ensures a smooth process and protects your nails from unnecessary stress. If you’re unsure where to start, a good gel-manicure-guide can help you understand the removal steps for both acetone and non-acetone methods. Here’s a list of items you’ll need for each approach.

  • Nail File (“Le Zebra” Nail File or similar): A medium-grit file (180–240 grit) to gently buff off the topcoat.
  • Acetone or Gel Polish Remover: Pure acetone for faster removal or a gentler gel remover for sensitive nails.
  • Gel Polish Remover Wraps: Pre-soaked wraps for convenience or DIY cotton pads with foil.
  • 10 Removal Clips: Secure wraps or foil to keep acetone in contact with nails.
  • Nail Cleanser or Prep Pads: To clean residue post-removal for a polished finish.
  • Cotton Balls/Pads and Foil: For DIY wraps, if not, use pre-made ones.
  • Wooden or Metal Cuticle Stick: To gently scrape off softened polish without damaging nails.
  • Lint-Free Wipes: For clean, streak-free wiping after removal.
  • Cuticle Oil and Moisturizer: To hydrate and nourish nails and cuticles post-removal.

Having these tools ready streamlines the process and minimizes the risk of nail damage. Invest in quality products to ensure safety and efficiency during removal.

Preparations Before You Start

Before removing gel polish, proper preparation sets the stage for a smooth and safe process. Start by cleaning your nails with soap and water to remove dirt, oils, or lotions that could interfere with acetone. Dry thoroughly to ensure the polish remover works effectively. Whether you’re wearing classic gel or something more modern like french-finish-nails, this step helps the acetone penetrate the gel more efficiently.

Choose a well-ventilated area, like a kitchen or bathroom, to avoid inhaling acetone fumes. Lay down paper towels or plastic wrap to protect surfaces, as acetone can damage furniture or countertops. If your nails are long, consider clipping them slightly to make wrapping easier. These precautions create a safe and efficient workspace.

Preparing your tools in advance saves time and reduces mess during the process. Ensure all supplies, like cotton pads, foil, and cuticle oil, are within reach. Taking these steps minimizes errors and ensures you’re ready to remove the polish without interruptions. A little preparation goes a long way in protecting your nails and surroundings.

Step-by-Step: How to Remove Gel Nail Polish (Using Acetone)

1. File the Top Layer of Your Gel Polish

  • Filing the glossy top layer is essential to help acetone penetrate the polish effectively.
  • Use a medium-grit nail file (180–240 grit) to buff the surface and edges of each nail gently.
  • Avoid over-filing, as it can thin and weaken your natural nails, leading to sensitivity.
  • Focus on removing the shiny topcoat only, not the entire gel layer.
  • Make sure you file evenly across the nail to scuff all parts of the polish.
  • This step doesn’t require removing all gel—just dull the surface enough.
  • Overdoing it can lead to nail damage, so proceed with patience.
  • A well-filed surface is the foundation for successful gel removal.

2. Soak Cotton Pads with Acetone

  • Use pure acetone and soak cotton pads or balls until saturated (not dripping).
  • Cut the pads into small, nail-sized pieces for better control and less mess.
  • Avoid using too much acetone—it can leak and irritate surrounding skin.
  • Proper soaking ensures the gel polish starts breaking down efficiently.
  • Place the soaked cotton directly over each nail, covering the entire polish area.
  • Opt for high-quality acetone for faster and more effective results.
  • Keep supplies ready in advance to stay organized and efficient.
  • Ensure contact is tight to reduce evaporation and maximize effect.

3. Wrap Each Nail in Foil or Use Removal Clips

  • Secure the soaked cotton on each nail with aluminium foil or removal clips.
  • Wrap each nail tightly to prevent evaporation and allow full acetone contact.
  • Clips can offer better grip and are reusable, making them a convenient option.
  • A snug wrap leads to quicker gel breakdown and minimal mess.
  • Ensure wraps are tight and secure, especially near edges, to prevent leakage.
  • If using foil, prepare pre-cut squares for easier wrapping.
  • Leaking wraps can irritate skin and slow the removal process.
  • This step is crucial for effective gel softening.

4. Wait 10–15 Minutes

  • Let your nails soak for 10–15 minutes—set a timer to stay accurate.
  • The gel will soften, flake, or crack as the acetone works.
  • Please don’t remove the wraps too early, as it may make scraping difficult.
  • Relax and keep your hands still to avoid loosening the wraps.
  • A slight warming sensation is normal as acetone activates.
  • If you feel discomfort or burning, remove the wraps and rinse immediately.
  • Use this time to rest, as patience protects your natural nails.
  • Waiting properly avoids the need for aggressive scraping.

5. Remove the Wraps and Check Progress

  • After the wait, remove one foil or clip to test the polish softness.
  • The gel should look cracked or flaky, indicating readiness for removal.
  • If it’s still firm, rewrap it and wait another 3–5 minutes.
  • Never force the polish off to prevent nail damage.
  • Gently test the surface with a cuticle stick or orangewood tool.
  • If the gel lifts easily, continue removing all wraps.
  • For stubborn spots, re-soak those specific nails.
  • Progress checks help you avoid over-scraping and nail stress.

6. Gently Scrape Off the Gel Polish

  • Use a wooden or metal cuticle stick to push off the loosened polish gently.
  • Scrape slowly and carefully, applying light pressure.
  • If the polish doesn’t come off easily, reapply the soaked cotton and wait again.
  • Rushing this step can scratch or damage your nails.
  • Don’t try to remove resistant patches by force—re-soaking is safer.
  • Clean your tool between nails to prevent residue build-up.
  • Keep your strokes gentle to maintain nail integrity.
  • This step should be smooth if the gel is properly softened.

7. Buff and Clean Your Nails

  • After removal, use a fine-grit buffer to even out your nail surface.
  • Lightly buff to remove any remaining product or roughness.
  • Avoid excessive buffing, which can thin and weaken the nails.
  • Your goal is a smooth finish, not thinning the nail plate.
  • Wipe nails with a lint-free wipe or nail cleanser to remove debris.
  • If needed, a small amount of acetone can help clean leftover stickiness.
  • Ensure nails are fully clean before moisturizing.
  • This step prepares your nails for recovery and care.

8. Wipe Nails Clean

  • Use a nail cleanser like “Le Clean” or a dry, lint-free wipe to clean residue.
  • This removes acetone and polish fragments from the nail surface.
  • A clean nail bed reduces irritation and preps for moisture.
  • Wipe gently—your nails may be sensitive post-removal.
  • If a cleanser isn’t available, a simple wipe works to remove fine dust.
  • Ensure no sticky or flaky residue remains.
  • Cleanliness at this stage leads to healthier regrowth.
  • This also improves the finish if you plan to reapply polish soon.

9. Nourish and Hydrate Your Nails

  • Apply cuticle oil to nails and surrounding skin to restore moisture.
  • Massage it gently to improve absorption and circulation.
  • Follow with a rich hand cream or moisturizer to hydrate fully.
  • This step is essential to restore nail strength and flexibility.
  • Choose a cuticle oil with vitamin E, jojoba oil, or almond oil.
  • Hydration helps prevent brittleness and future breakage.
  • Incorporate this into your daily routine, not just post-removal.
  • Regular nourishment maintains nail health between manicures.

How to Remove Gel Polish Without Acetone

For those sensitive to acetone or seeking gentler alternatives, non-acetone methods can effectively remove gel polish. Non-acetone gel removers, like those from Nails Inc., use milder solvents to break down polish. These products are less drying but may take longer to work. Household alternatives, like vinegar or alcohol, are less effective and risk irritating skin.

Always test natural alternatives on a small area first, as they can be unpredictable. Non-acetone methods are ideal for those with dry or sensitive nails but may require more patience. Combining these products with proper moisturizing ensures nail health. Follow product instructions carefully to avoid overexposure.

  • Non-Acetone Gel Remover: Choose a reputable brand designed for gel polish removal.
  • Soaking Pads or Cotton Balls: Apply the remover evenly across nails.
  • Warm Water Soak (Optional): Soaking nails in warm water can loosen the polish before applying remover.
  • Cuticle Stick: This is for gentle scraping after the polish softens.
  • Moisturizer: To hydrate nails immediately after removal to prevent dryness.

Using a Gel Polish Remover: Step-by-Step

Non-acetone gel polish removers offer a gentler alternative for those avoiding harsh chemicals. Here’s a step-by-step guide to using them effectively.

  • File the Topcoat: Lightly buff the gel polish surface to break the seal, allowing the remover to penetrate.
  • Apply Gel Polish Remover: Soak a cotton pad with the remover and place it on the nail, securing it with foil or clips.
  • Wait as Directed (Usually 5-10 Minutes): Follow the product’s instructions, as times vary by brand.
  • Loosen and Remove the Polish: Gently scrape off softened polish with a cuticle stick, reapplying remover if needed.
  • Moisturize Immediately After: Apply cuticle oil and hand cream to restore hydration and prevent brittleness.

This method minimizes nail stress while effectively removing polish. Always follow the remover’s specific guidelines for best results.

Top Gel Polish Remover Products Worth Trying

Choosing the right products can make gel polish removal easier and safer. Here are some top-rated options for effective at-home removal.

  • CND Offly Fast Moisturizing Acetone: A professional-grade acetone that removes gel quickly while minimizing dryness.
  • Nails Inc. Gel-less Remover Kit: Includes non-acetone remover and tools for a gentle, complete removal process.
  • BTArtbox Foil Wraps: Pre-cut foil wraps designed for secure, leak-free acetone soaking.
  • Graham Hands Down Gel Nail Wraps: Reusable wraps that simplify the removal process with a snug fit.

These products are trusted for their efficiency and nail-friendly formulas. Pair them with proper techniques to achieve salon-quality results at home.

Common Mistakes to Avoid When Removing Gel Polish

Avoiding mistakes during gel polish removal is crucial to maintaining healthy nails. Here are common errors and how to steer clear of them.

  • Picking or Peeling Off Polish: This strips layers of the nail, causing thinning and weakness.
  • Soaking Nails in an Acetone Bath: Submerging nails in acetone dries out skin and nails excessively.
  • Overusing Electric Nail Drills: Aggressive drilling can damage the nail plate and lead to sensitivity.
  • Rushing the Process: Hurrying can result in over-filing or forceful scraping, harming nails.

Taking your time and using proper tools prevents these pitfalls. Patience and care ensure your nails remain strong and undamaged.

Tips for Safe Removal and Nail Recovery

After removing gel polish, nurturing your nails is essential for recovery and long-term health. Incorporate these practices to maintain strong, healthy nails.

  • Repair Damaged Nails: Use a nail strengthener like OPI Nail Envy for 1–2 weeks post-removal.
  • Take Breaks Between Manicures: Allow nails to rest for a week every 2–3 manicures to prevent weakening.
  • Moisturize Daily: Apply cuticle oil and hand cream regularly to combat dryness and brittleness.
  • Avoid Harsh Chemicals: Limit exposure to household cleaners; wear gloves to protect nails.
  • Visit a Professional if Needed: For severe damage, consult a nail technician or dermatologist for treatment.

These tips promote nail resilience and prevent damage from frequent gel manicures. Consistent care ensures your nails stay healthy and beautiful.

Conclusion

Removing gel polish at home can be safe and effective with the right tools and techniques. By following the acetone or non-acetone methods outlined, you can protect your nails from damage while achieving a clean result. Avoiding common mistakes, like peeling or over-filing, is key to maintaining nail health. Incorporate regular moisturizing and breaks between manicures to keep your nails strong.

With the right preparation and care, you can enjoy gel manicures without compromising your natural nails. Use quality products and take your time during removal to ensure the best outcome. Healthy nails enhance your manicure’s beauty, so prioritize recovery and maintenance. Happy polishing, and enjoy your vibrant, damage-free nails!

Leave A Comment

Your email address will not be published. Required fields are marked *