Amazing Salon Tricks for a Perfect Blowout

  • Home
  • Beauty
  • Amazing Salon Tricks for a Perfect Blowout

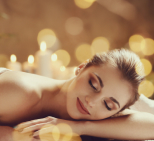
A perfect blowout can transform your hair, giving it volume, shine, and a polished, salon-worthy finish. With the right techniques and tools, you can achieve this professional look at home, saving time and money. 

Here, we’ll break down the essential steps and techniques to elevate your blowout game, ensuring a flawless, professional result every time.

1. The Foundation: Pre-Blowout Hair Care

  • Clean, Damp Hair: Start with freshly washed hair to remove oils and buildup, ensuring maximum volume. Towel-dry or air-dry until 70-80% dry to reduce heat exposure and improve styling control.
  • Shampoo and Conditioner: Choose products suited for your hair type—volumizing for fine hair, hydrating for thick or curly hair. Apply conditioner to mid-lengths and ends to avoid weighing down roots.
  • Detangling: Use a wide-tooth comb or detangling brush on wet hair, starting from ends to roots, to prevent breakage and ensure smooth, manageable strands.

2. The Right Tools for a Salon-Worthy Blowout

  • Blow Dryer: Opt for an ionic or ceramic dryer with multiple heat and speed settings. Ionic reduces frizz, while ceramic ensures even heat distribution to prevent damage.
  • Round Brush: Select a brush size based on hair length—smaller for short hair, larger for long hair. Boar bristle brushes add shine, while ceramic ones retain heat for faster styling.
  • Heat Protectant: Apply a lightweight heat protectant spray to shield hair from damage and enhance smoothness.
  • Additional Tools: Use sectioning clips, a fine-tooth comb for precision, and blow-dry lotions for added hold and shine.

3. Sectioning Your Hair Like a Pro

  • Divide and Conquer: Split hair into 3-4 sections (top, sides, back) to ensure even drying and maximum volume. Start with the lower layers and work your way up.
  • Secure Sections: Use sturdy clips to keep sections in place, preventing loose strands from disrupting the drying process and maintaining shape.

4. Blow-Drying Techniques: The Secret to a Perfect Blowout

  • Dryer Positioning: Hold the dryer at a downward angle to smooth the cuticle and enhance shine. Keep the nozzle 6-8 inches from the hair to avoid overheating.
  • Brush Techniques: Use a round brush to lift hair at the roots and pull through to the ends for body and bounce. For curly hair, use less tension to maintain its natural texture; for straight hair, increase tension for a sleek look.
  • Speed vs. Precision: Work methodically, drying each section fully before moving on to avoid uneven results. Rushing can lead to frizz or flatness.
  • Using Tension: Apply gentle tension with the brush while drying to create smoothness and volume, especially at the roots.

5. Achieving Volume and Body

  • For Flat Hair: Dry hair at a 90-degree angle from the scalp to lift roots. Focus airflow upward at the roots for added height.
  • Lift from the Roots: Roll the brush upward at the roots while drying, holding for a few seconds to set the lift in place.
  • Velcro Rollers: After drying, place large Velcro rollers at the crown for 10-15 minutes to boost volume and create a polished shape.

6. Adding Waves or Curls to Your Blowout

  • Creating Natural Waves: Twist sections of hair around a round brush while drying, then release gently to form soft, beachy waves.
  • Curls vs. Waves: For bouncy curls, wrap hair tightly around the brush and hold longer under heat. For looser waves, use less tension and a larger brush.
  • Finishing Touches: Set waves or curls with a light mist of flexible hold hairspray to maintain shape without stiffness.

7. The Final Touch: Setting Your Blowout

  • Cool Shot Button: Finish each section with the dryer’s cool shot to lock in the style and close the hair cuticle for added shine.
  • Finishing Products: Apply a lightweight shine serum or anti-frizz spray to tame flyaways and add a glossy finish. Use sparingly to avoid weighing hair down.
  • Don’t Overdo It: Avoid heavy hairsprays or gels that can make hair crunchy or flat. Opt for products with a flexible hold to allow for natural movement.

8. Maintaining Your Blowout for Longer

  • Avoiding Frizz: Use a silk or satin scarf to wrap hair during humid weather to minimize frizz. Avoid touching hair excessively to prevent oil transfer.
  • Protecting Overnight: Sleep on a silk pillowcase or wear a loose hair bonnet to reduce friction and maintain smoothness.
  • Quick Touch-Ups: Use a dry shampoo at the roots and give the hair a quick pass with the blow dryer to refresh volume without needing to rewash.

9. Common Mistakes to Avoid for a Perfect Blowout

  • Overdrying: Stop drying when hair is fully dry to avoid frizz and damage. Overdrying strips moisture, leaving hair dull and brittle.
  • Wrong Products: Choose products specific to your hair type (e.g., anti-frizz for curly hair, volumizing for fine hair) to avoid poor results.
  • Skipping Sectioning: Rushing through sectioning leads to uneven drying, flat spots, and missed areas, compromising the blowout’s polish.

Conclusion

Mastering a salon-quality blowout at home is entirely achievable with the right preparation, tools, and techniques. At Charisma Beauty Lounge, we believe that every great style starts with a great foundation. By beginning with clean, well-prepped hair, using professional-grade tools, and applying expert blow-drying techniques, you can achieve that voluminous, shiny, and long-lasting finish. Avoid common mistakes like overdrying or skipping sectioning, and follow our tried-and-true maintenance tips to keep your blowout fresh for days. With a little practice and the guidance of Charisma Beauty Lounge’s expert advice, these salon secrets will soon feel second nature—so you can flaunt a flawless blowout anytime, anywhere.

Leave A Comment

Your email address will not be published. Required fields are marked *